 |
| "I don't get it." |
This is what Sparklepus looks like in the Form 1's PreForm software.

How's it done? With lasers of course!

Fresh from the oven.

Ready for finishing.
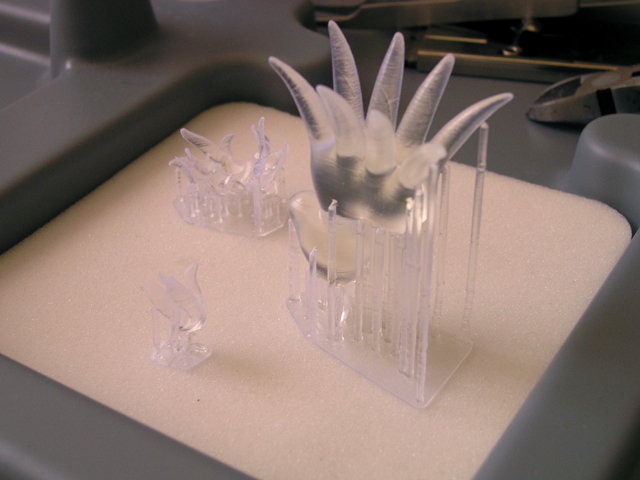
Supports removed. Clippers come in handy for this stage.

Cleaned up and ready for painting.

Detail of the mane and tail. Considering the overhangs, I was surprised that the Form 1 could print this without error. "No problem boss!"

Painted!
 Beauty shots!


Final observations: The original Sparklepus model was not created with 3D printing in mind--in fact, it was only meant to look good for the 3 shots in 'Happy Box'. The PreForm software evaluated that it would be fine to print it but the mane concerned me and I decided not to risk it.
For this 'print-friendly' version, I modified the hair pieces slightly by adding four more locks and reshaping some of the 'roots' to fully penetrate the 'skin'. The body shape was then used to subtract the intersecting volume from the two hair pieces to make them form fitting for easy assembly. Finally, Sparklepus was separated into three objects: body, mane and tail. This not only made the model more printable but it also made it a lot easier to paint. Other than that, it's the same object Sergeant is holding in the top image.
Once I got the model into PreForm, printing and clean up was mostly hassle free.
My one issue came during the finishing process: with the clear resin material, it was difficult to see how good a job I was doing until after the parts were painted. As it turned out, the mane is a little rougher than I like. I wonder if finishing will become easier once the gray or white materials becomes available. No worries; having done this once now, I feel I can do a better job next time with the clear resin.
Conclusion: considering 'Sparklepus' is my first 3D print, I'm thrilled with the results. The Form 1 is simply a wonderful and amazing addition to our studio!
Technical Notes
- Material: Clear Resin
- Amount used: 18.1 ml
- Print Time: 7 hours (This time can be significantly improved. See Update #2 below for new info.)
- Software: LightWave Modeler, 3D Coat, MeshLab, Photoshop (for waterslide decals), and PreForm 0.8.2.
- Paint: Montana Black NC.Formula, Colors: Juice and Punk Pink.
- Decal: Experts-Choice No. 119 for inkjet Printers
- Finishing coat (not applied yet in pics above): Micro Sol Setting Solution (for softening and bonding decals,) Krylon UV-Resistant Clear Matte
Update #2: I just learned I can speed up the printing process by choosing the 100 microns setting. This comes at the cost of fine detail but since this model isn't particularly detailed to begin with, 100 microns might possibly result in a smoother surface too. Really should test this immediately.
By the way, this model was printed at 50 microns (the default setting) and the printer is capable of getting as fine as 25 microns. Microns, schmicrons, so what's does that mean in English? To put it in perspective, the thickness of human hair varies between 50 and 120 microns!
G.
1 comment:
You might want to use Micro-Set (red bottle), it goes on top of the decal after your place it on the model...don't touch the decal after you put the Micro-Set on...its common for the decal to wrinkle after applying Micro-Set. When dry use (we use spray lacquer) seal with gloss or flat coat.
Micro-Sol - you might want to test for color affects on a scrap test piece before using...we've had some slight staining on tones of Tamiya grey occur...YMMV. We've gotten around that by using a coat for Future wax (yes the floor stuff...note it's trade name has recently changed) applied via airbrush before using Micro-Sol...this has two effects..protects the paint and secondly the decal snuggles down into the wax surface and the edges disappear producing a very smooth surface with little/no transition to the decal.
Questions on your post-processing...
1) were you sanding the piece to smooth it out? if so, what grit(s) did you find most useful? How long did it take for the sanding or other post-processing steps?
2) How easy were the artifacts from the support structures to remove?
3) Have you tried printing anything with very fine detail? Would love to see an example of say small rivets/bolts or similar :-)
Post a Comment